Building a Flexible, Cost-Efficient Web Infrastructure on AWS.

I'm an ECE B.Tech student with a passion for DevOps. Skilled in CI/CD, containerization, scripting, and adept at AWS, I've successfully executed projects with a focus on DevSecOps and Kubernetes. Eager to explore the vast possibilities in cloud technologies.
My project focused on building a web infrastructure designed to be flexible, efficient, and modern. By leveraging Amazon Web Services (AWS), the goal was to showcase the advantages for businesses in adopting a 'scale-on-demand' strategy. This approach helps reduce the requirement for large initial investments by implementing a pay-as-you-go system.
Architecture Overview
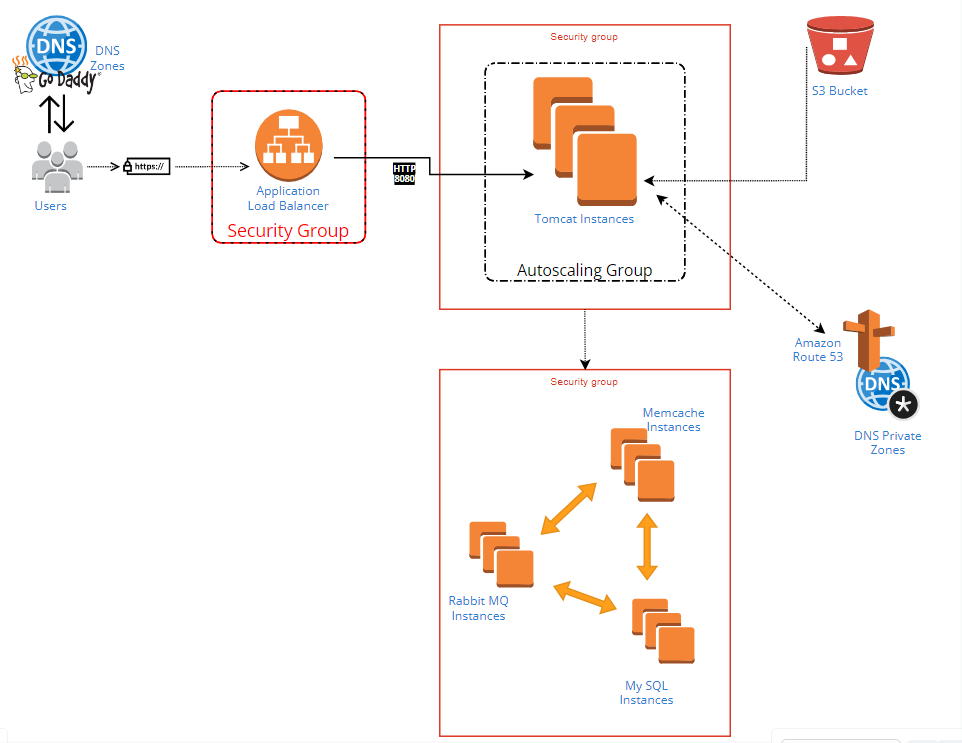
The architecture of the deployment is designed to be robust and resilient, as illustrated in the provided diagram.
Key components include:
DNS Zones: Domain management was facilitated through GoDaddy with DNS zones defined for routing traffic.
Application Load Balancer (ALB): To distribute incoming application traffic across multiple targets, an ALB was employed, encased within a security group to ensure secure access.
Autoscaling Group: For the application layer, Tomcat instances were encapsulated within an autoscaling group, allowing the system to automatically adjust the capacity to maintain steady, predictable performance.
S3 Bucket: Amazon S3 was used to store and retrieve any amount of data at any time, providing a simple web services interface.
Amazon Route 53: For DNS web service, Route 53 was configured to connect user requests to infrastructure running in AWS.
Memcache Instances: For caching, Memcache instances were set up to decrease database load by storing objects in memory.
RabbitMQ Instances: This message-broker software was used to queue the messages between different components of the application.
MySQL Instances: The persistence layer of the architecture is handled by MySQL instances for database services.
Step 1: Setting Up Security Groups
Securing our web application starts with configuring the appropriate security groups within AWS. These act as a virtual firewall for our instances to control inbound and outbound traffic. Here's the process to ensure our environment is secure and functional:
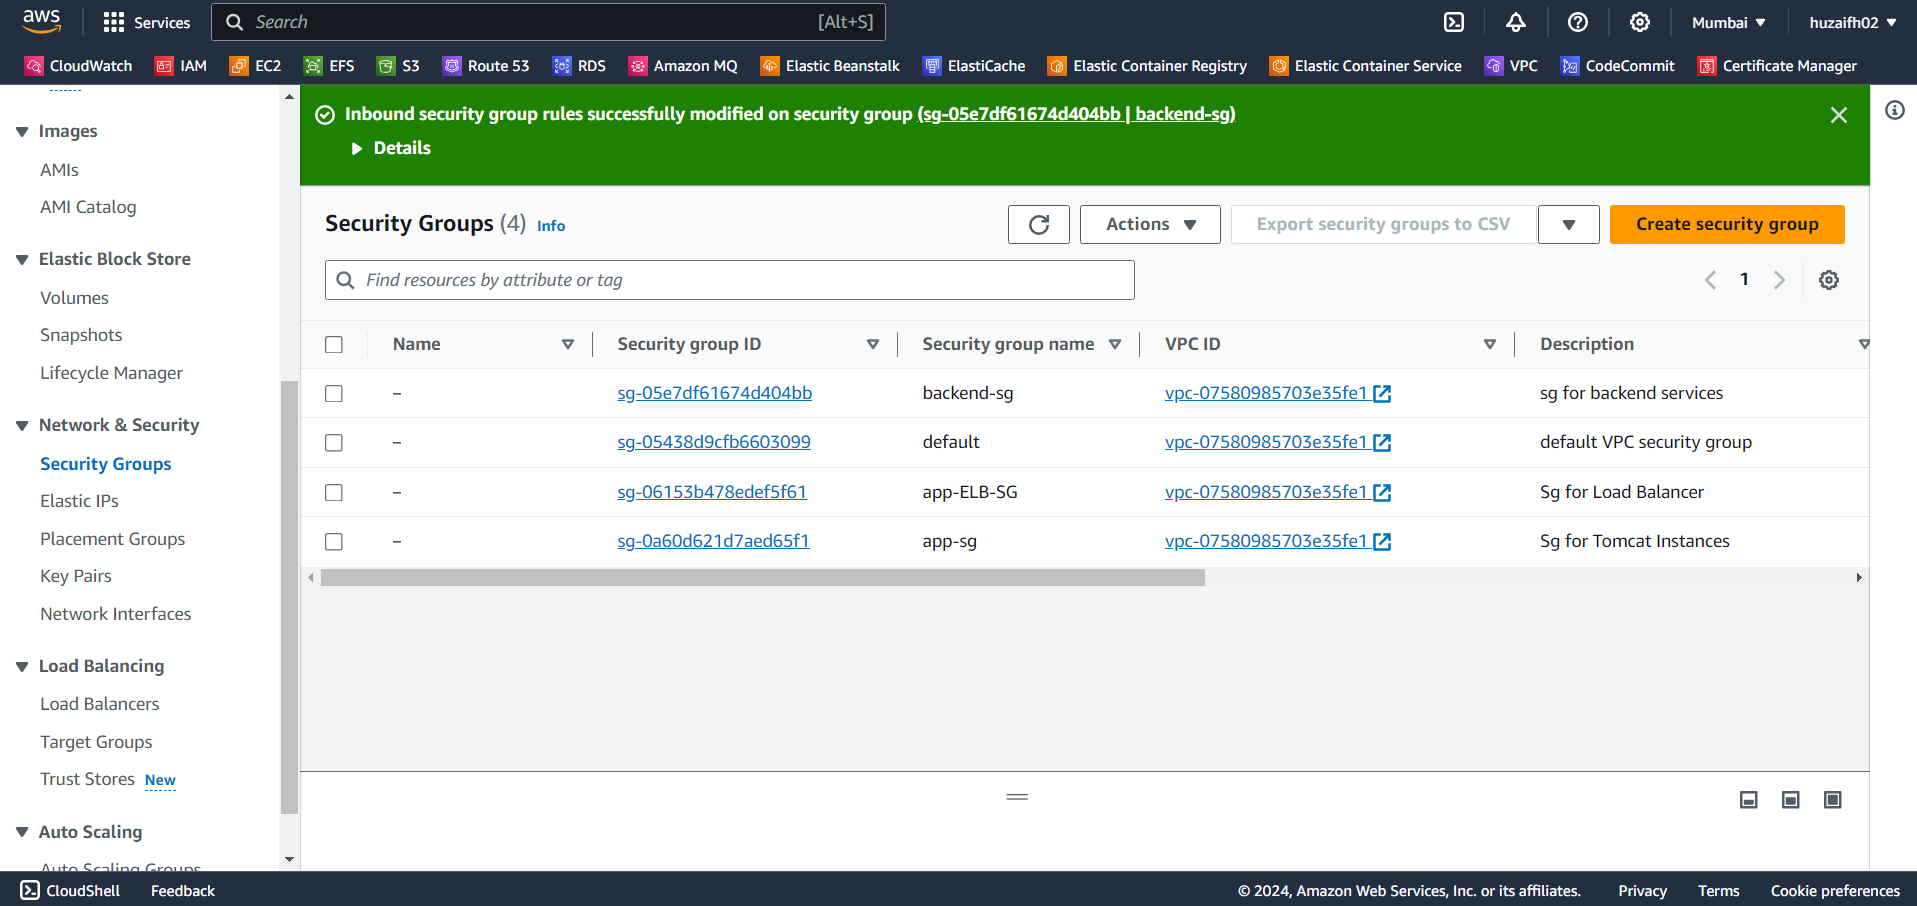
Load Balancer Security Group (LB-SG): We create a security group for our Application Load Balancer that allows inbound HTTPS traffic from all sources. This is crucial for secure communication with the end-users.
Inbound Rules: HTTPS (port 443) from anywhere (0.0.0.0/0)
Outbound Rules: All traffic allowed (by default)
Tomcat Security Group (Tomcat-SG): Next, we set up the security group for our Tomcat instances. These need to accept incoming traffic from the Load Balancer Security Group to handle user requests.
Inbound Rules: Custom TCP (port 8080) from LB-SG
Outbound Rules: All traffic allowed to Backend-SG
Backend Security Group (Backend-SG): This security group is for our backend services including MySQL, RabbitMQ, and Memcached. Each service is configured to accept traffic on its respective port from the Tomcat Security Group.
Inbound Rules:
MySQL (port 3306) from Tomcat-SG
RabbitMQ (port 5672) from Tomcat-SG
Memcached (port 11211) from Tomcat-SG
Also, all traffic is permitted within Backend-SG to allow communication between backend services.
Port Configuration: The specific port numbers for MySQL, RabbitMQ, and Memcached are determined from the
application.propertiesfile in the source code. It's essential to align these ports with what the application expects to ensure seamless connectivity.
By carefully setting up these security groups, we establish a secure and orderly flow of traffic between the different layers of our application infrastructure. This sets the stage for deploying the application components in a secure manner.
Step 2: EC2 Instances Setup
The foundation of our scalable web application lies in the Amazon EC2 instances, which will serve as the backbone for our services. Here's how to set them up:
Selecting the Operating System: For our backend services, we choose CentOS Stream AlmaLinux OS 9 available in the AWS Marketplace. This choice brings stability and performance to our backend processes. For our Tomcat servers, we go with Ubuntu for its ease of use and rich community support.
Cloning from Git Repository: We start by cloning the source code and provisioning scripts from our Git repository. This allows us to maintain version control and automate the setup process.
Provisioning the Instances: Using the scripts, we provision our instances with the necessary software and configurations. For the database, we ensure MariaDB is up and running, listening on the default port.
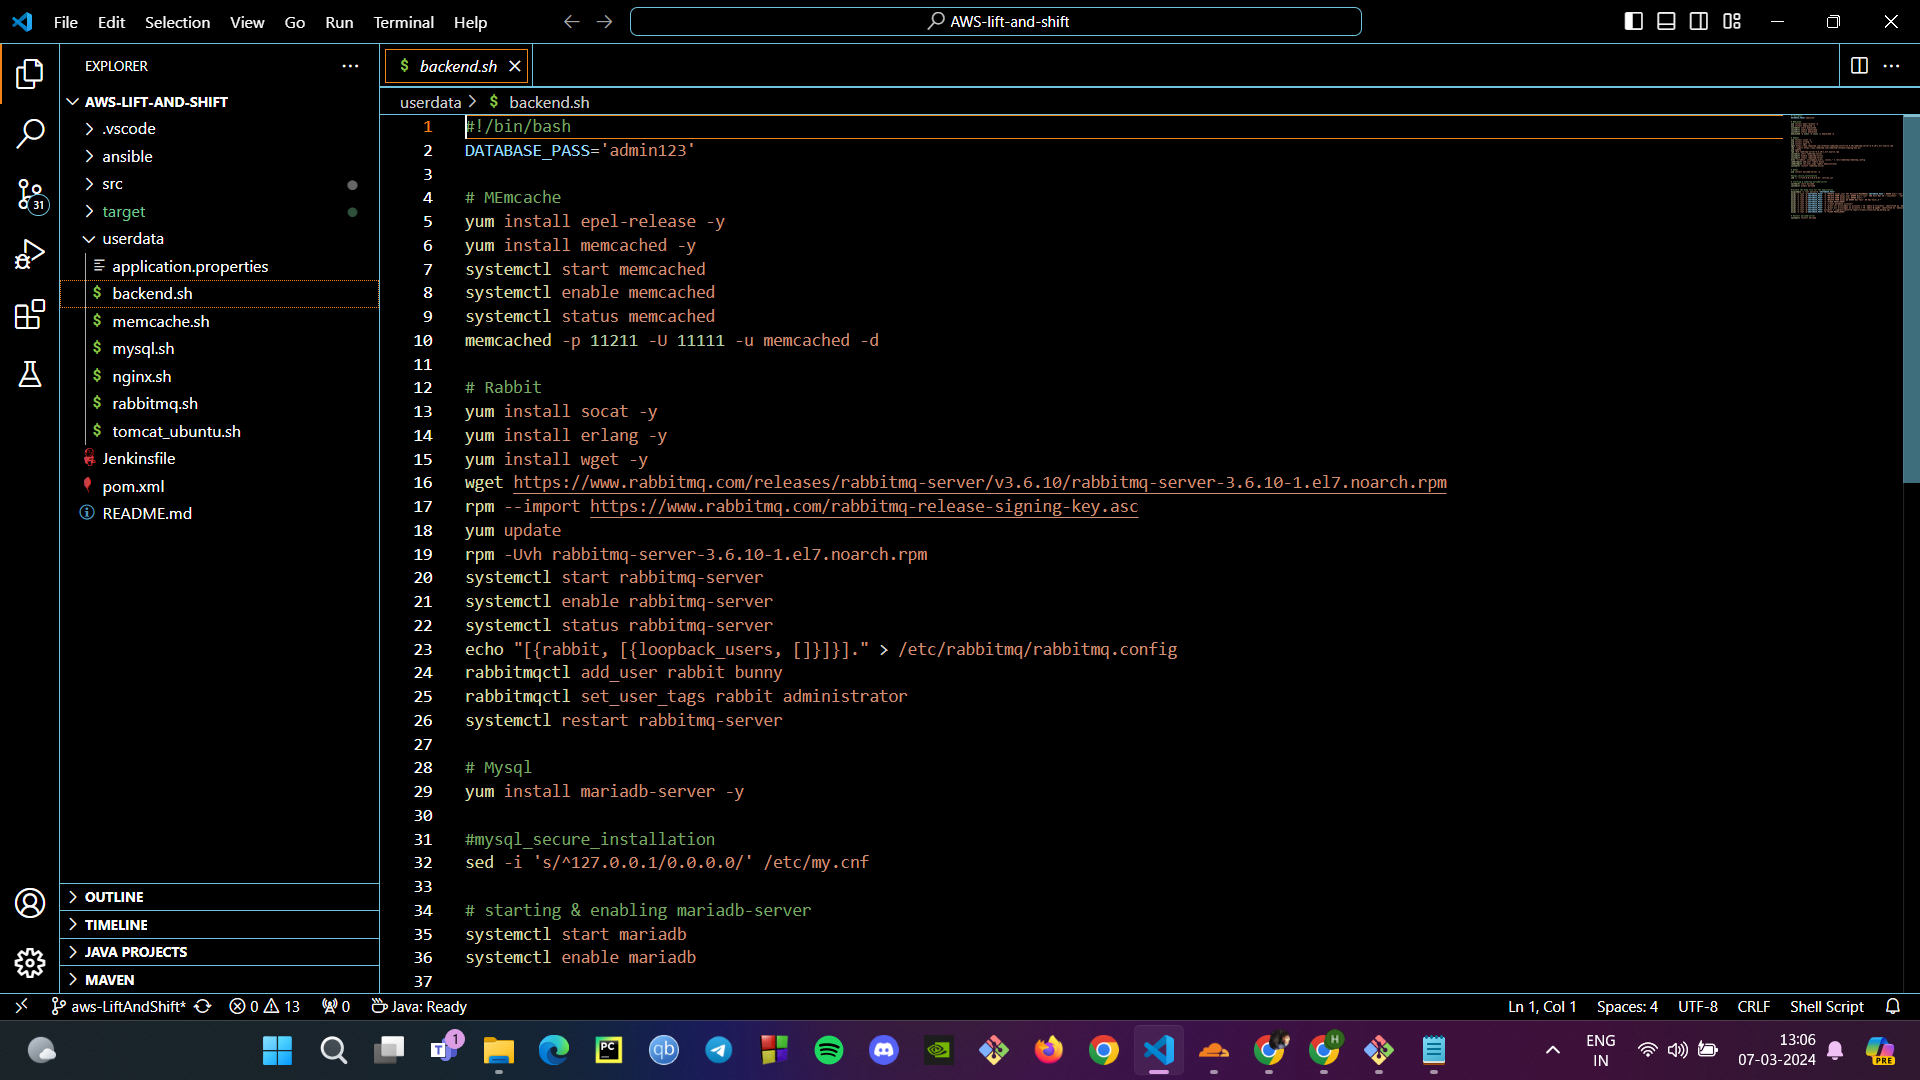
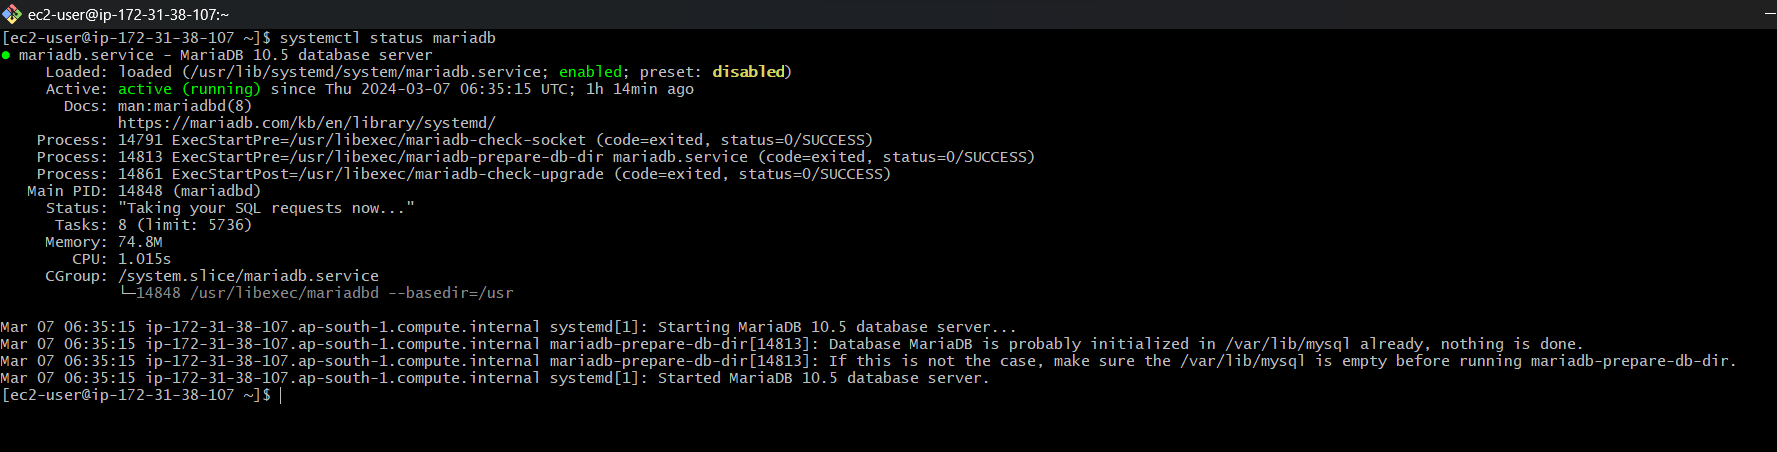
Verifying the Services: We check that the essential services are running and listening on their respective ports. For MariaDB, it’s port 3306; for RabbitMQ, port 5672; and for Memcached, port 11211.
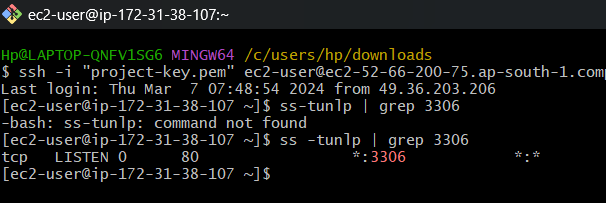


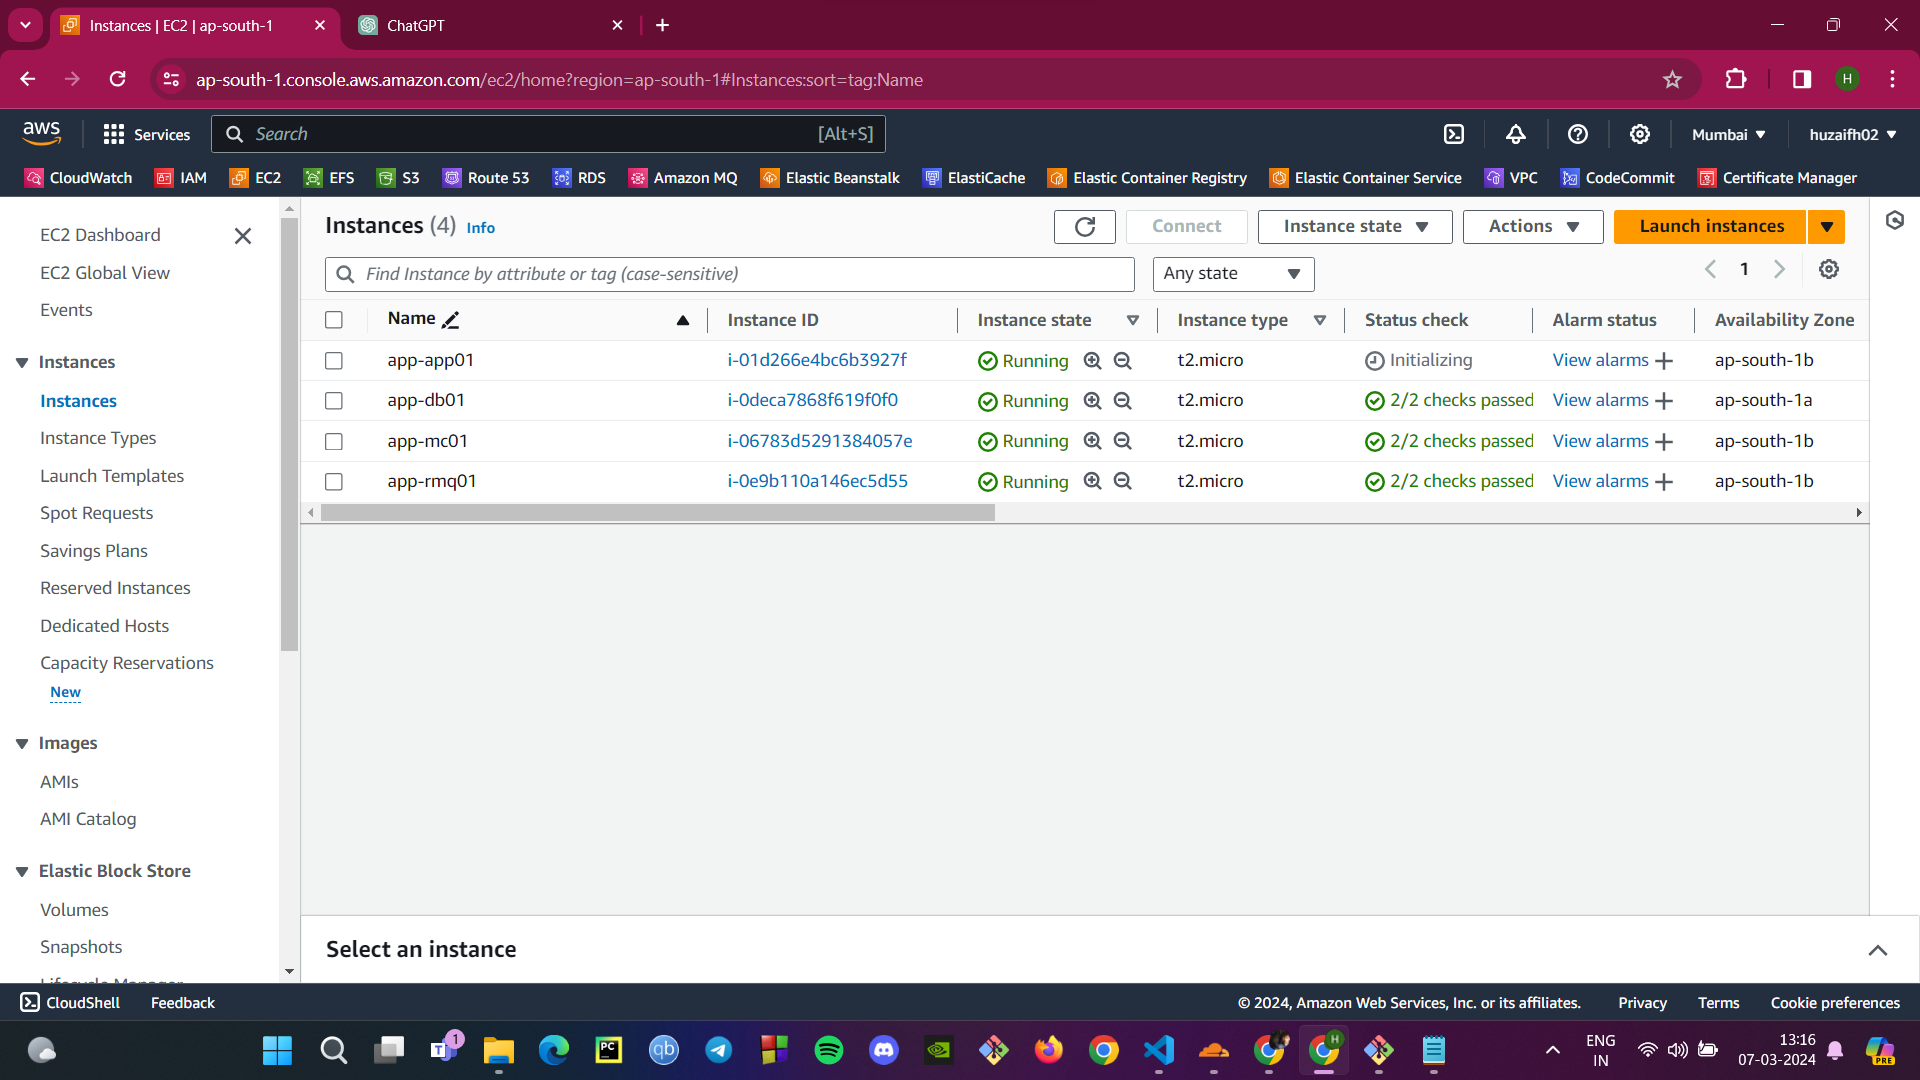
Instance Overview: With our instances up and running, we get an overview of their status in the EC2 Dashboard, ensuring all checks pass and the instances are in a healthy state.
By following these steps, we've laid the groundwork for our web application, ensuring that the underlying infrastructure is solid, secure, and ready for the next phase of deployment.
Step 3: Configuring AWS Route 53
Proper DNS setup is essential for service discovery and routing in a scalable web application. AWS Route 53 will be used to manage DNS records, allowing our backend services to communicate securely within the VPC and routing traffic efficiently. Here’s how to configure Route 53:
Private Hosted Zone: Start by setting up a private hosted zone within your VPC. This will ensure that all DNS queries for your domain are resolved within the AWS network, improving security and response times.
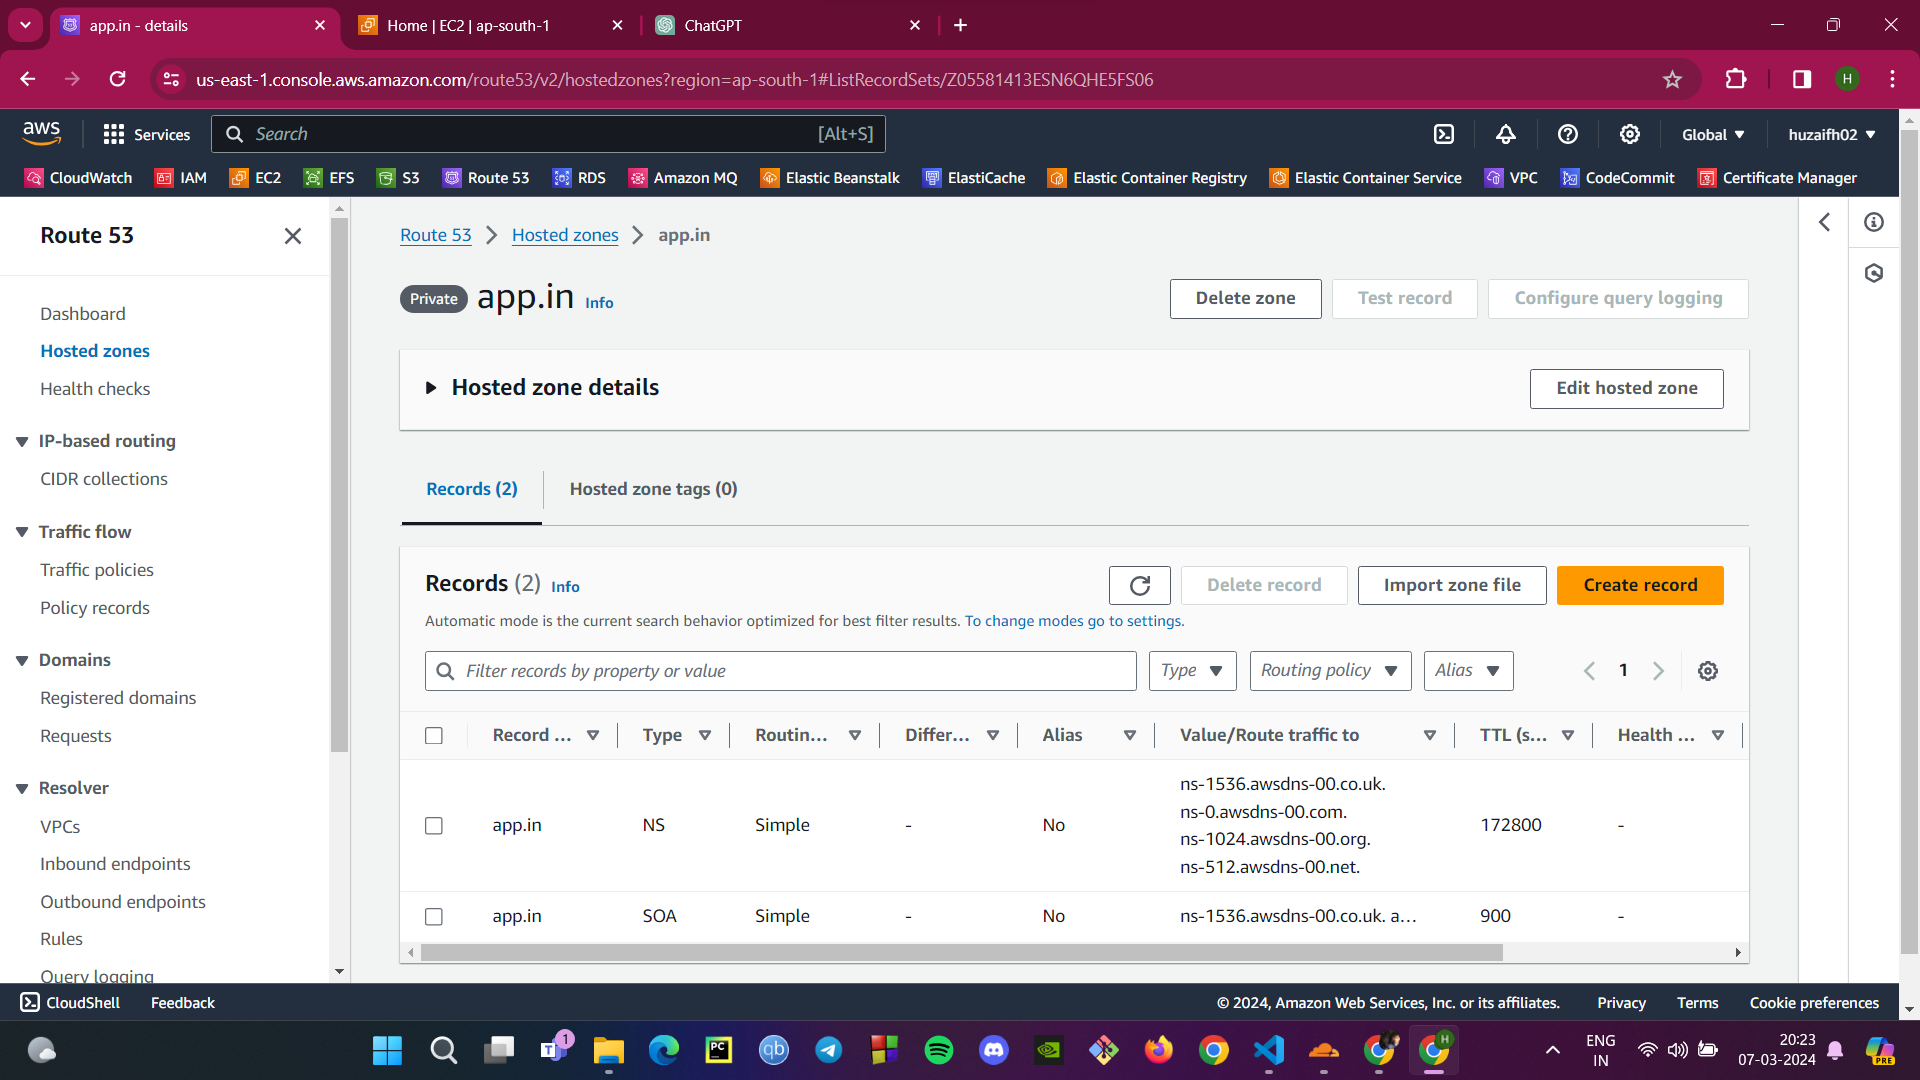
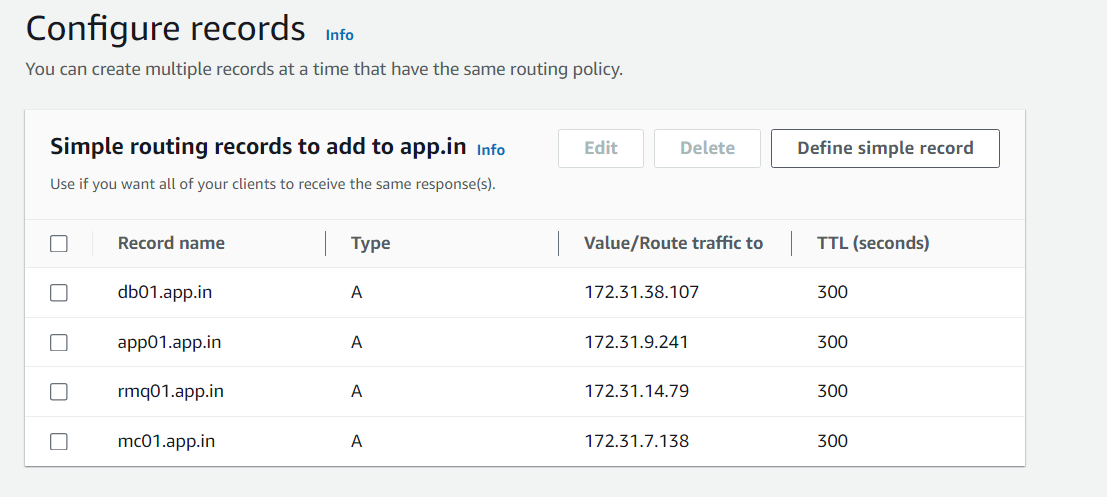
Creating Routing Records: For each backend service, create an A record in the hosted zone. These records map the domain names for your backend services to their respective IP addresses, ensuring that service requests are directed to the correct servers.
Database Service:
db01.app.inpoints to the IP address of your database server.Memcached Service:
mc01.app.inpoints to the IP address of your Memcached server.RabbitMQ Service:
rmq01.app.inpoints to the IP address of your RabbitMQ server.
Editing app.properties File: Update the
application.propertiesfile in your source code with the hosted zone names. This ensures that your application components can resolve each other’s addresses using the private DNS.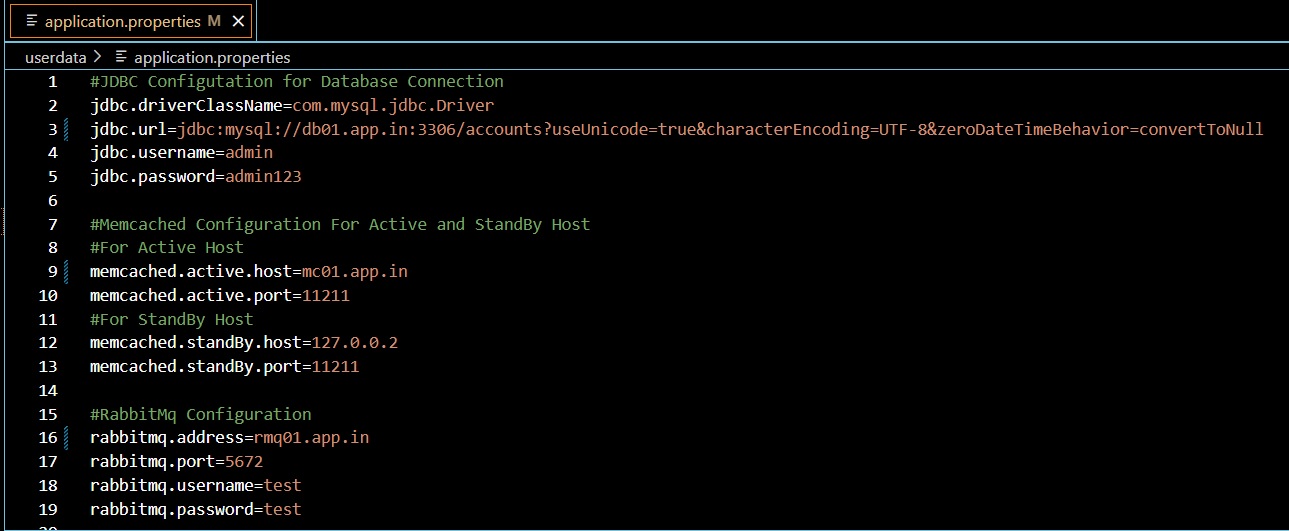
By following these steps, you establish a robust DNS setup that is not only optimized for a private AWS environment but also paves the way for smooth scaling and management of your web application's backend services.
Step 4: Building the Application Artifact with Maven
Building our application into a deployable artifact is a critical step. To ensure compatibility and functionality, we sometimes need to use specific versions of Maven and JDK, as directed by the developers. Here's how to build your application with Maven:
Prepare the Environment:
Ensure the correct version of JDK is installed and configured on your machine. This will be based on the application's requirement or developer's instructions.
Install the specified version of Maven to manage project dependencies and build processes.
Clone the Repository:
Retrieve the latest version of the source code from GitHub by cloning the repository. Use the following command:
git clone <GitHub RepositoryURL>. Replace<GitHubRepository URL>with the actual URL of your GitHub repository. This will create a local copy of your project's source code on your machine.The source code can be found at: https://github.com/huzaifh02/AWS-lift-and-shift.git
Update Application Properties:
- Modify the
application.propertiesfile to reflect the correct DNS routing for your backend services, such as database connections and message brokers. The file should match the records set up in AWS Route 53.
- Modify the
Build with Maven:
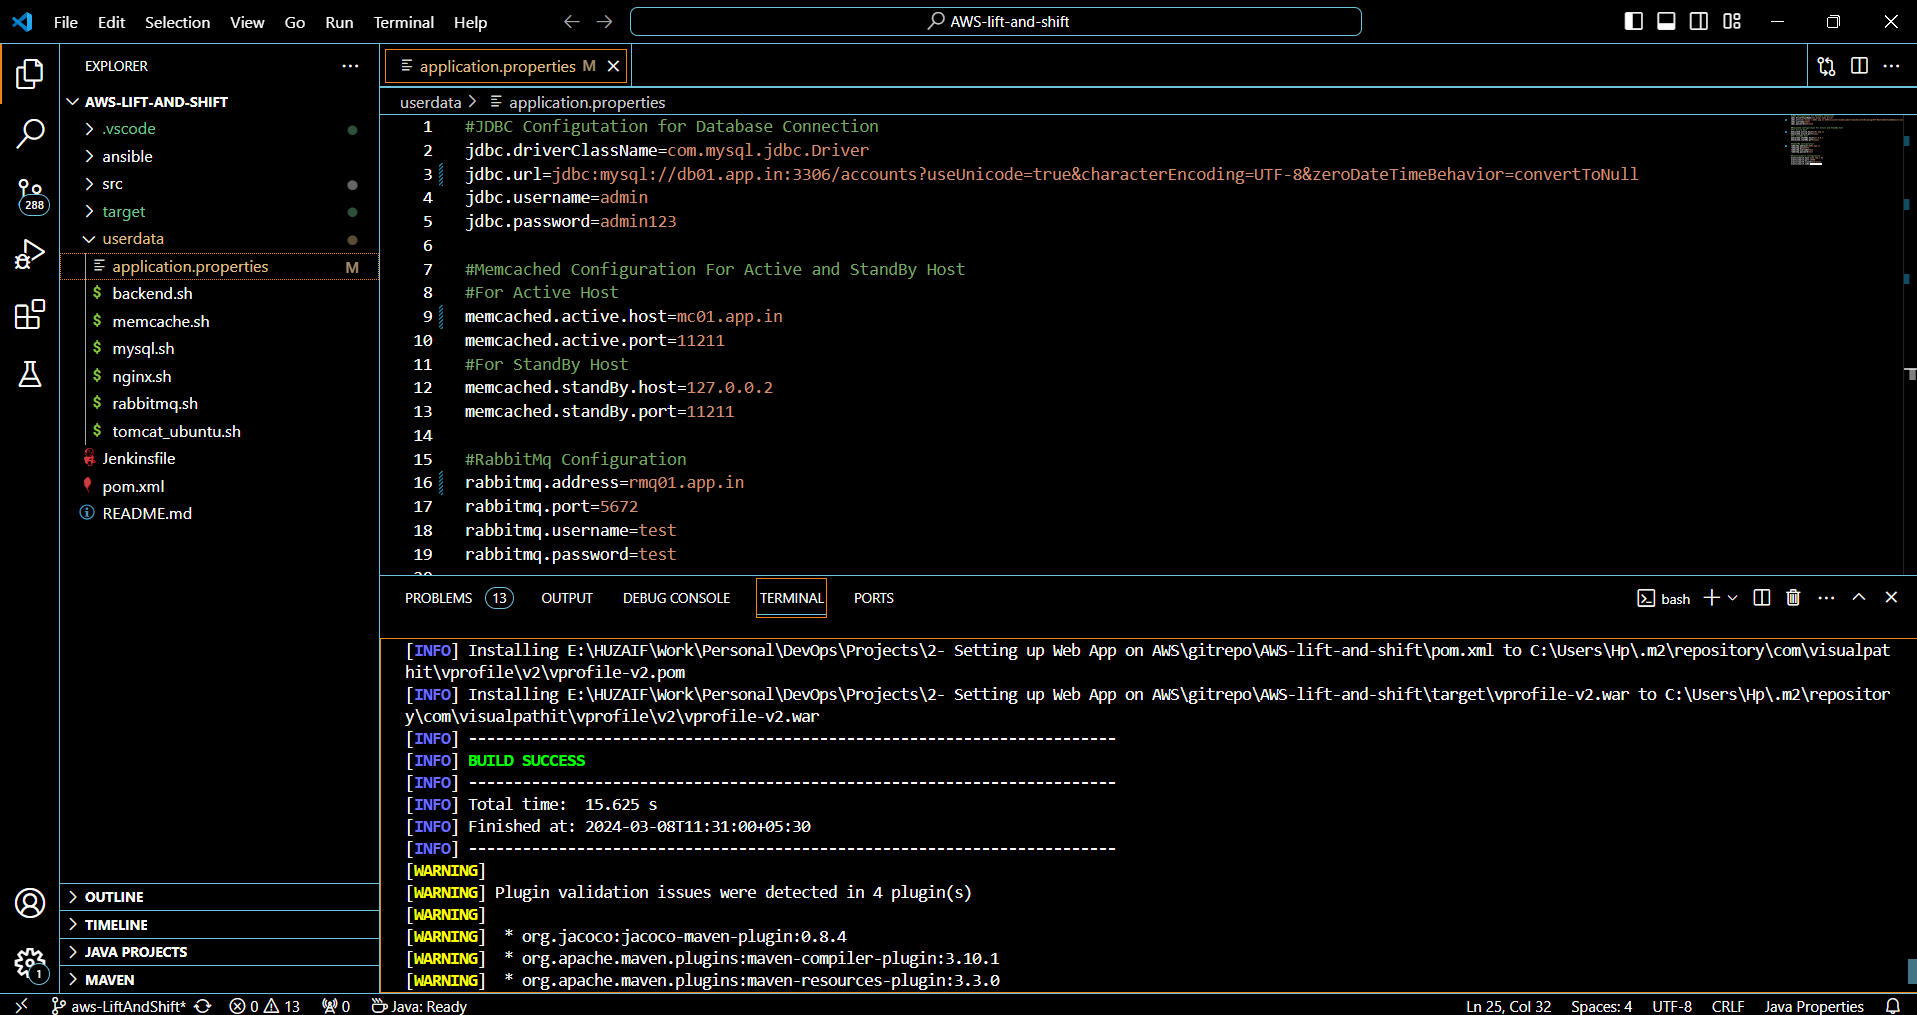
Navigate to your project's root directory where the
pom.xmlfile is located.Run the Maven build command:
mvn clean install. This will compile your source code, run any tests, and package the application into a WAR file.Check the output for "BUILD SUCCESS" to confirm that the application compiled and packaged correctly. Any warnings or errors should be resolved to ensure a stable build.
Once the build is successful, the artifact (e.g., yourapp.war) will be in the /target directory of your project, ready to be deployed to the application server.
Step 5: Artifact Deployment from Windows to Tomcat via S3
Deploying our application artifact involves a few key steps from uploading the artifact to an S3 bucket, granting appropriate IAM permissions, and finally deploying to a Tomcat instance on AWS EC2. Here’s how it’s done:
Using AWS CLI for S3 Operations:
With AWS CLI installed and configured on your Windows machine, use the command
aws s3 mb s3://<YourBucketName>to create a new S3 bucket. Replace<YourBucketName>with your actual bucket name.
Uploading the WAR File to S3:
Run the command
aws s3 cp <YourWarFilePath> s3://<YourBucketName>to upload your WAR file to the S3 bucket.Verify the upload by listing the contents of the bucket with
aws s3 ls s3://<YourBucketName>.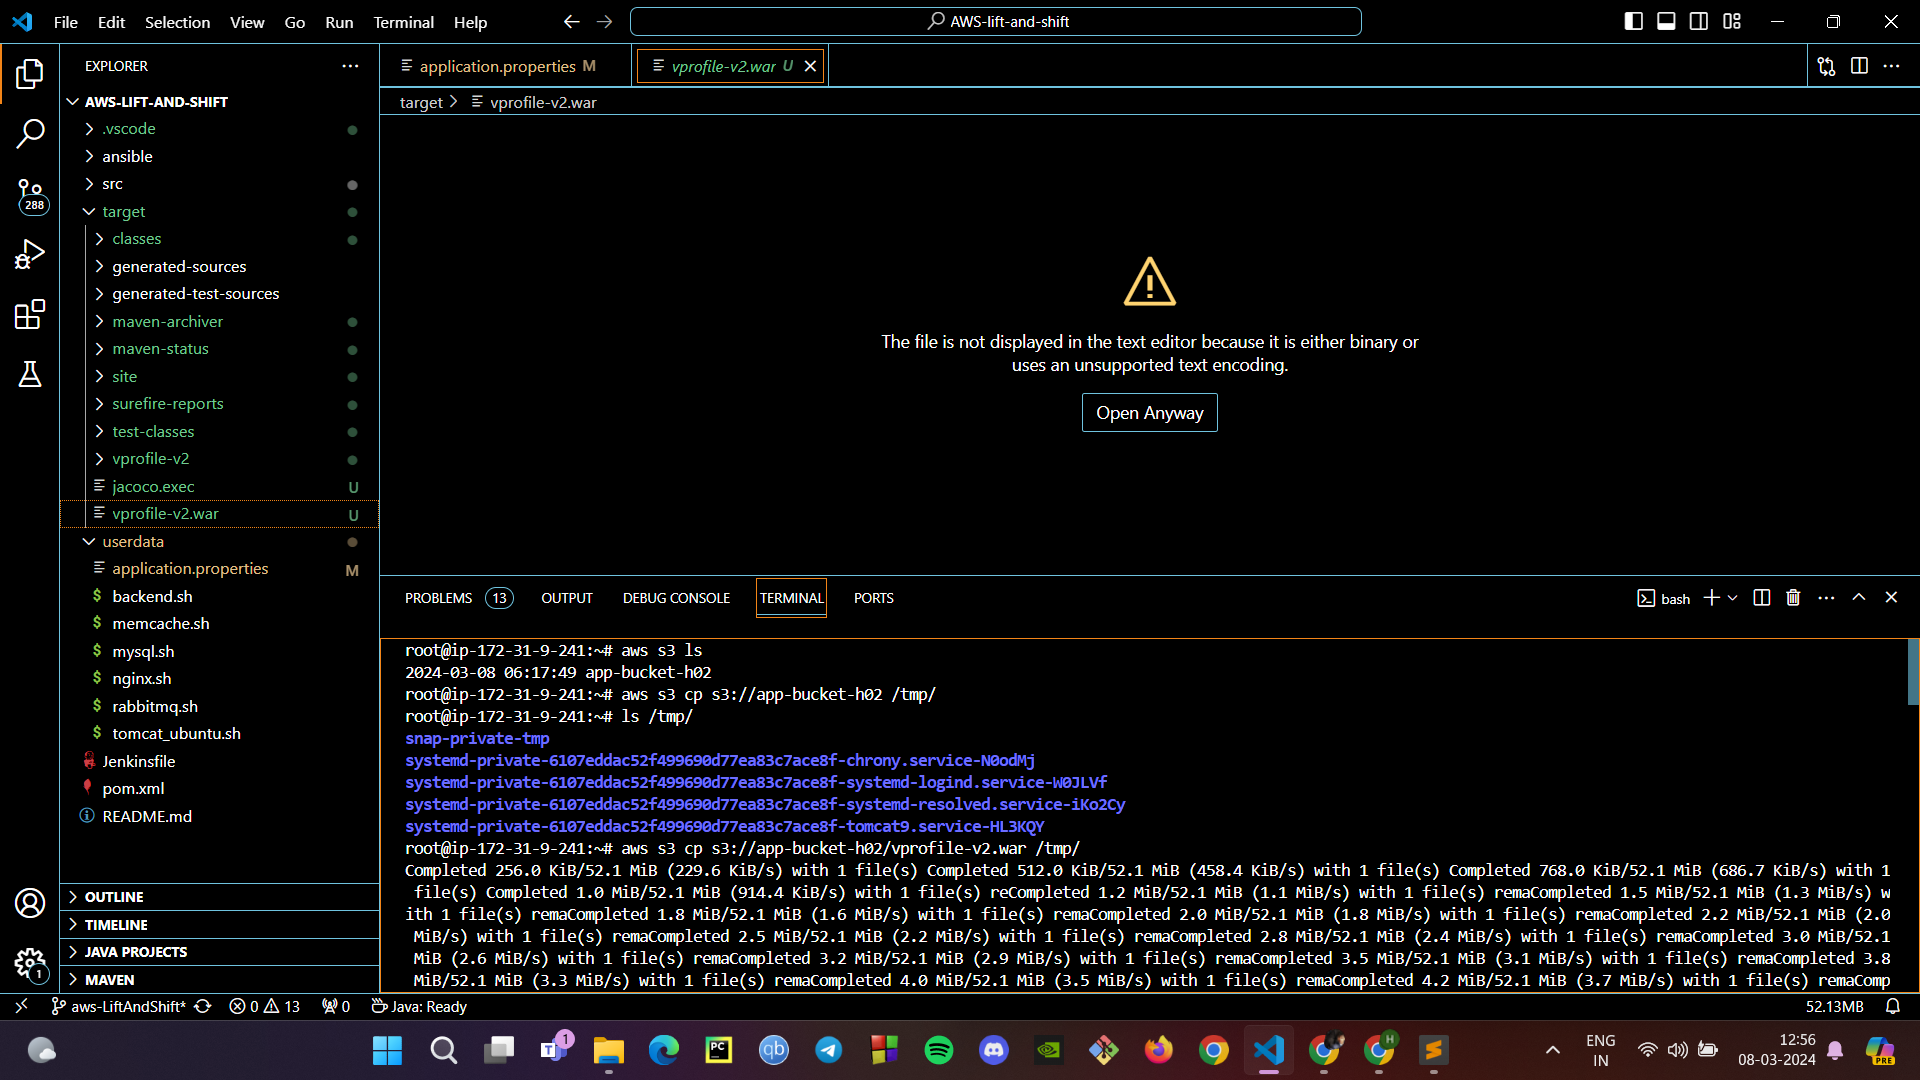
Copying Artifact from S3 to EC2 Instance:
On your EC2 instance, use the AWS CLI to copy the WAR file from S3 to the Tomcat webapps directory with
aws s3 cp s3://<YourBucketName>/<YourWarFile> /tmp/.Move the WAR file from the temporary directory to the webapps directory with
cp /tmp/<YourWarFile> /var/lib/tomcat9/webapps/ROOT.war.
Starting Tomcat:
Before starting Tomcat, ensure the previous version of the app is removed by executing
rm -rf /var/lib/tomcat9/webapps/ROOT.Start the Tomcat server using the command
systemctl start tomcat9to deploy the new WAR file.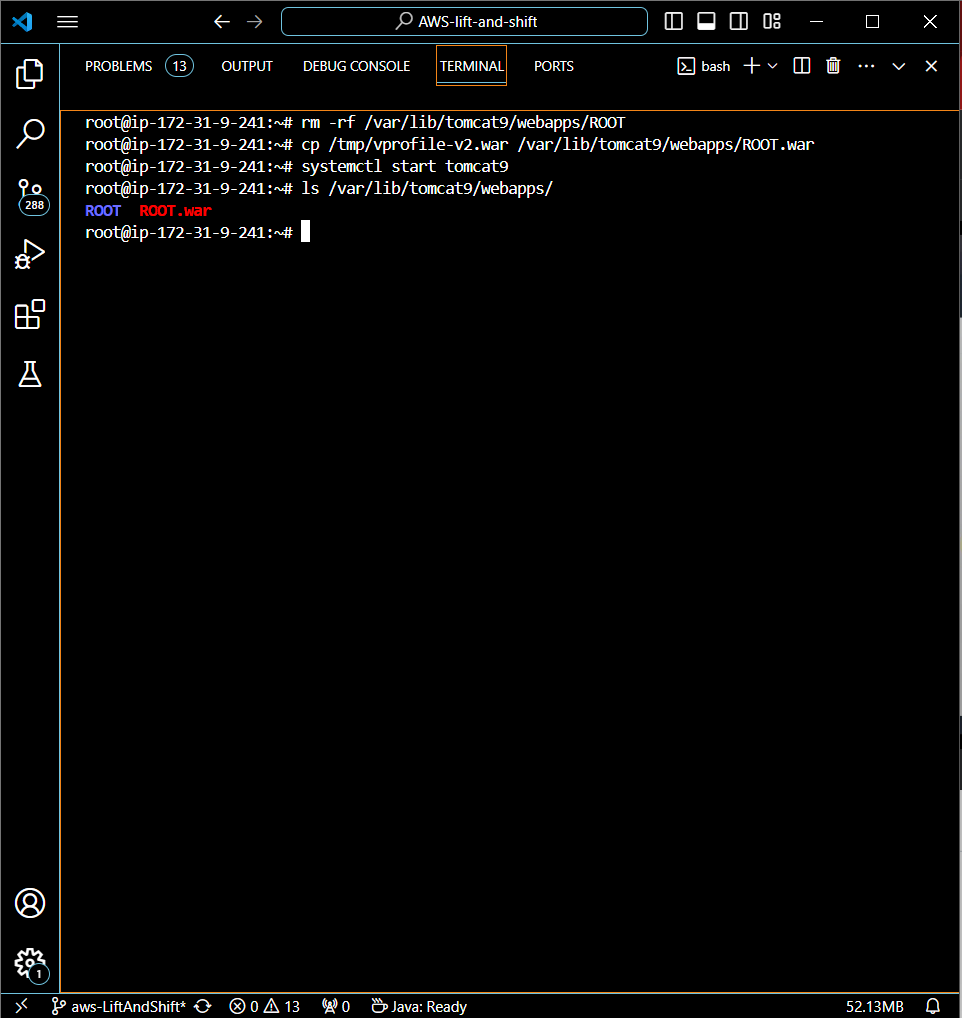
By executing these steps, we've built the application artifact on a Windows environment using Maven, then deployed it to an S3 bucket, and copied the artifact from S3 to our Tomcat instance on AWS EC2. With Tomcat now running, the application is successfully deployed and ready to serve users.
Step 6: Setting Up the ELB and Configuring DNS with GoDaddy
To distribute traffic efficiently across our deployed Tomcat instances and ensure high availability, we'll set up an Application Load Balancer (ALB) in AWS. Then, we'll configure the DNS records with GoDaddy to point to our ALB.
Create Target Group:
In the AWS Management Console, create a target group for your Tomcat application instances. This group will manage traffic to instances that are listening on port 8080.
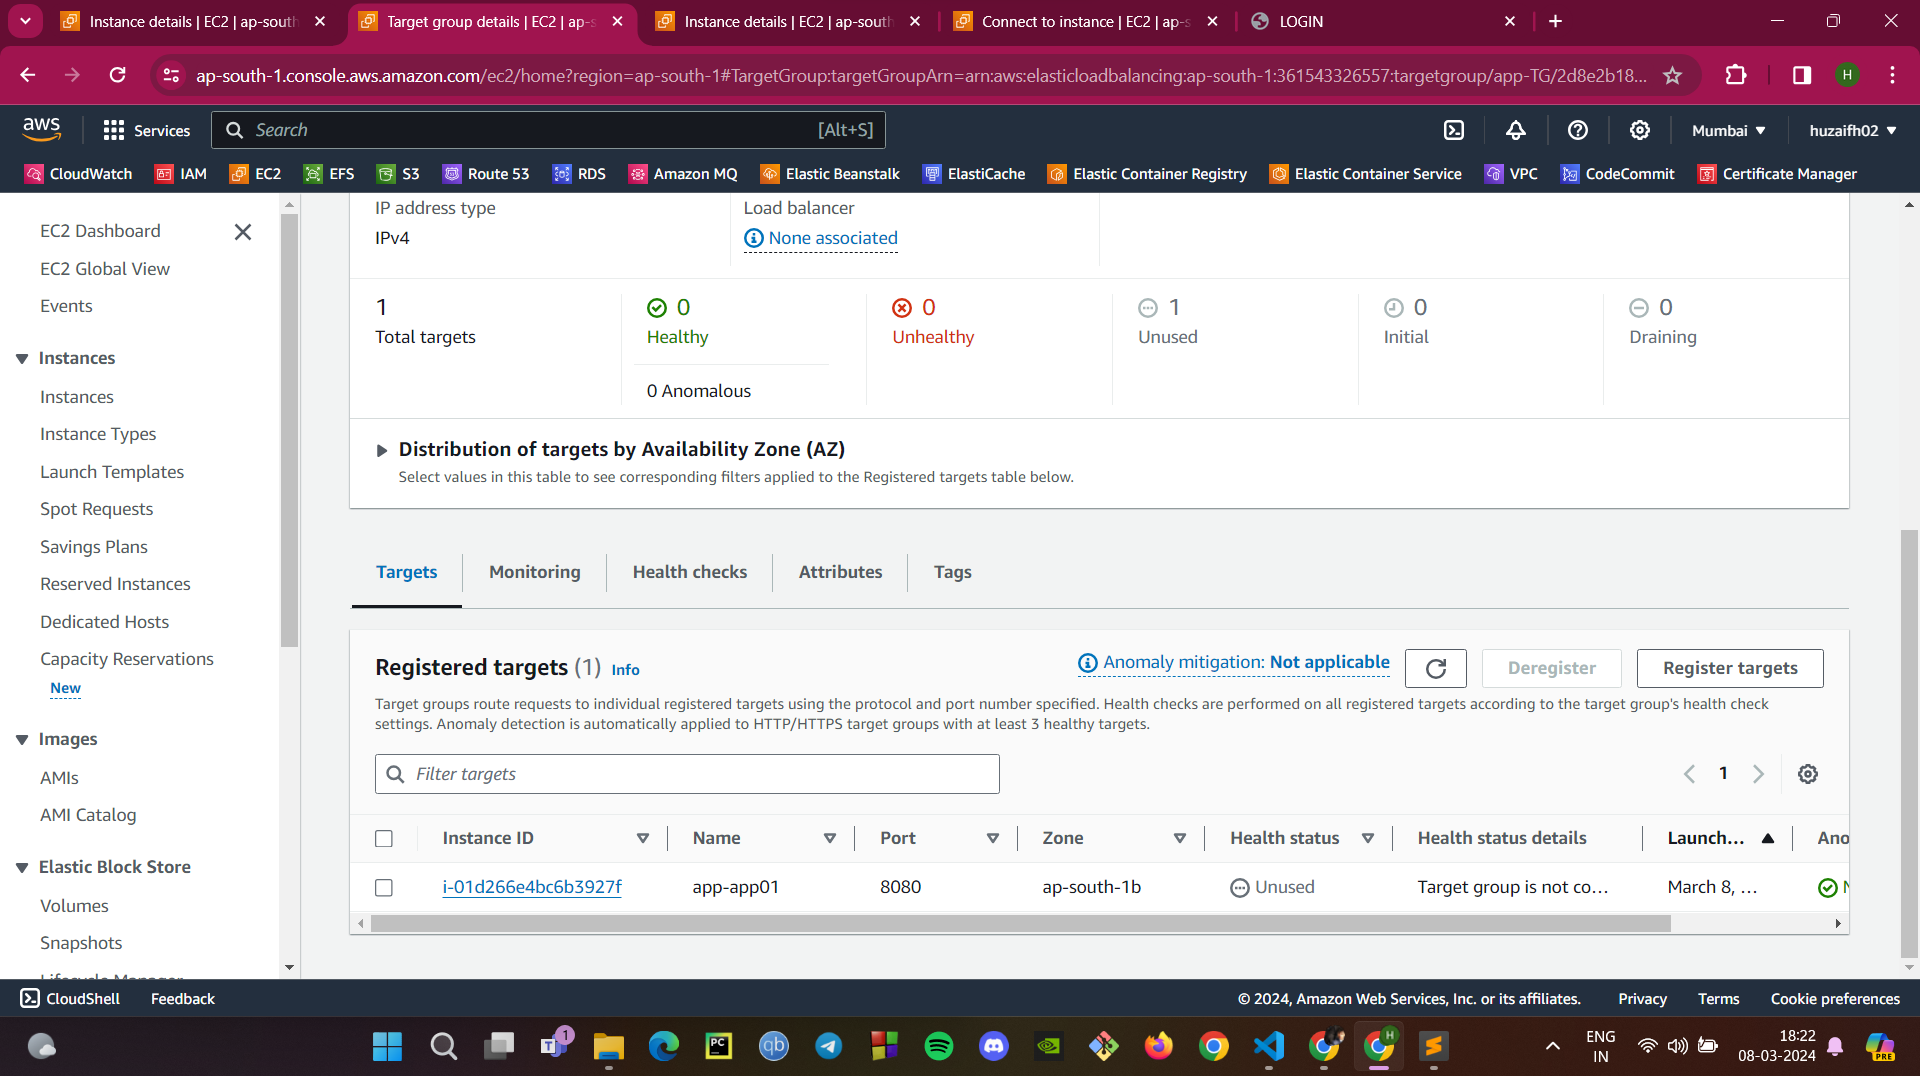
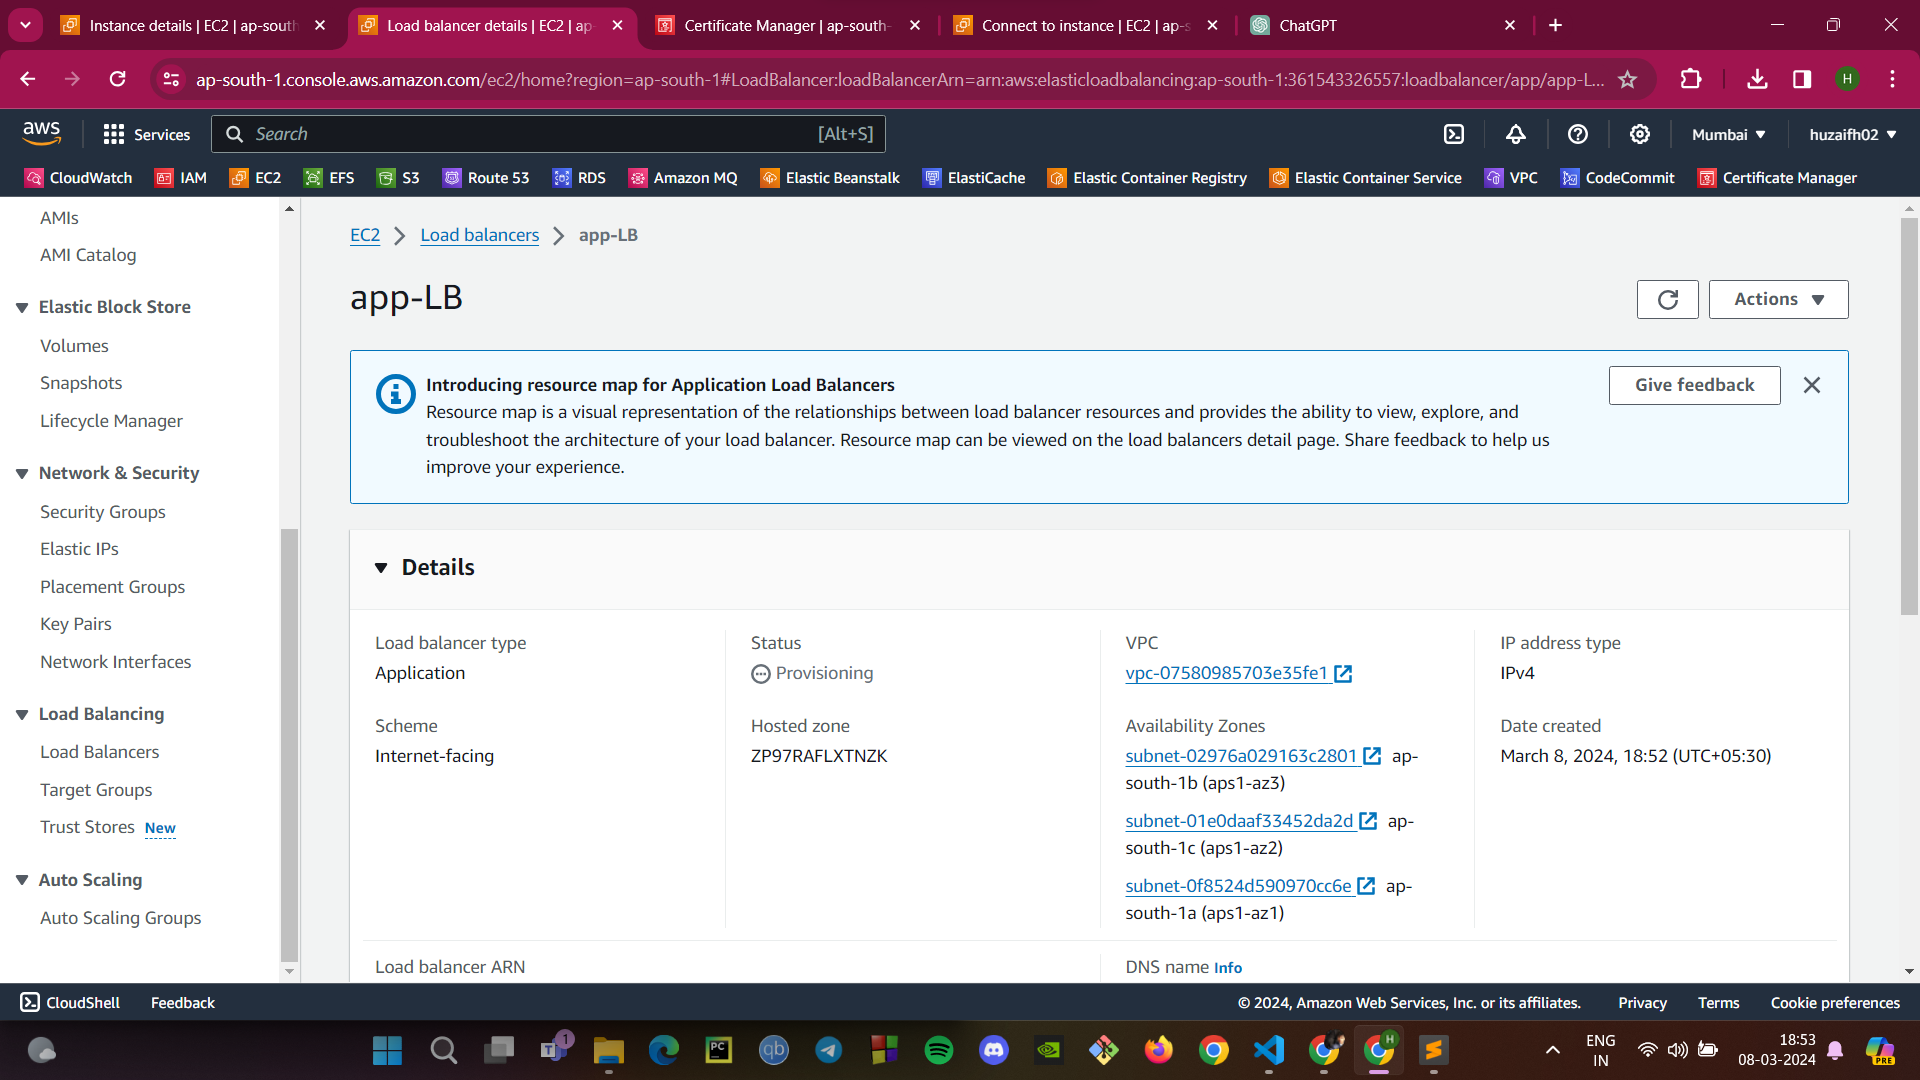
Set Up Application Load Balancer:
Configure the ALB to listen on ports 80 (HTTP), 443 (HTTPS), and 8080 (Application Port).
Ensure that the ALB is internet-facing and is correctly associated with your target group.
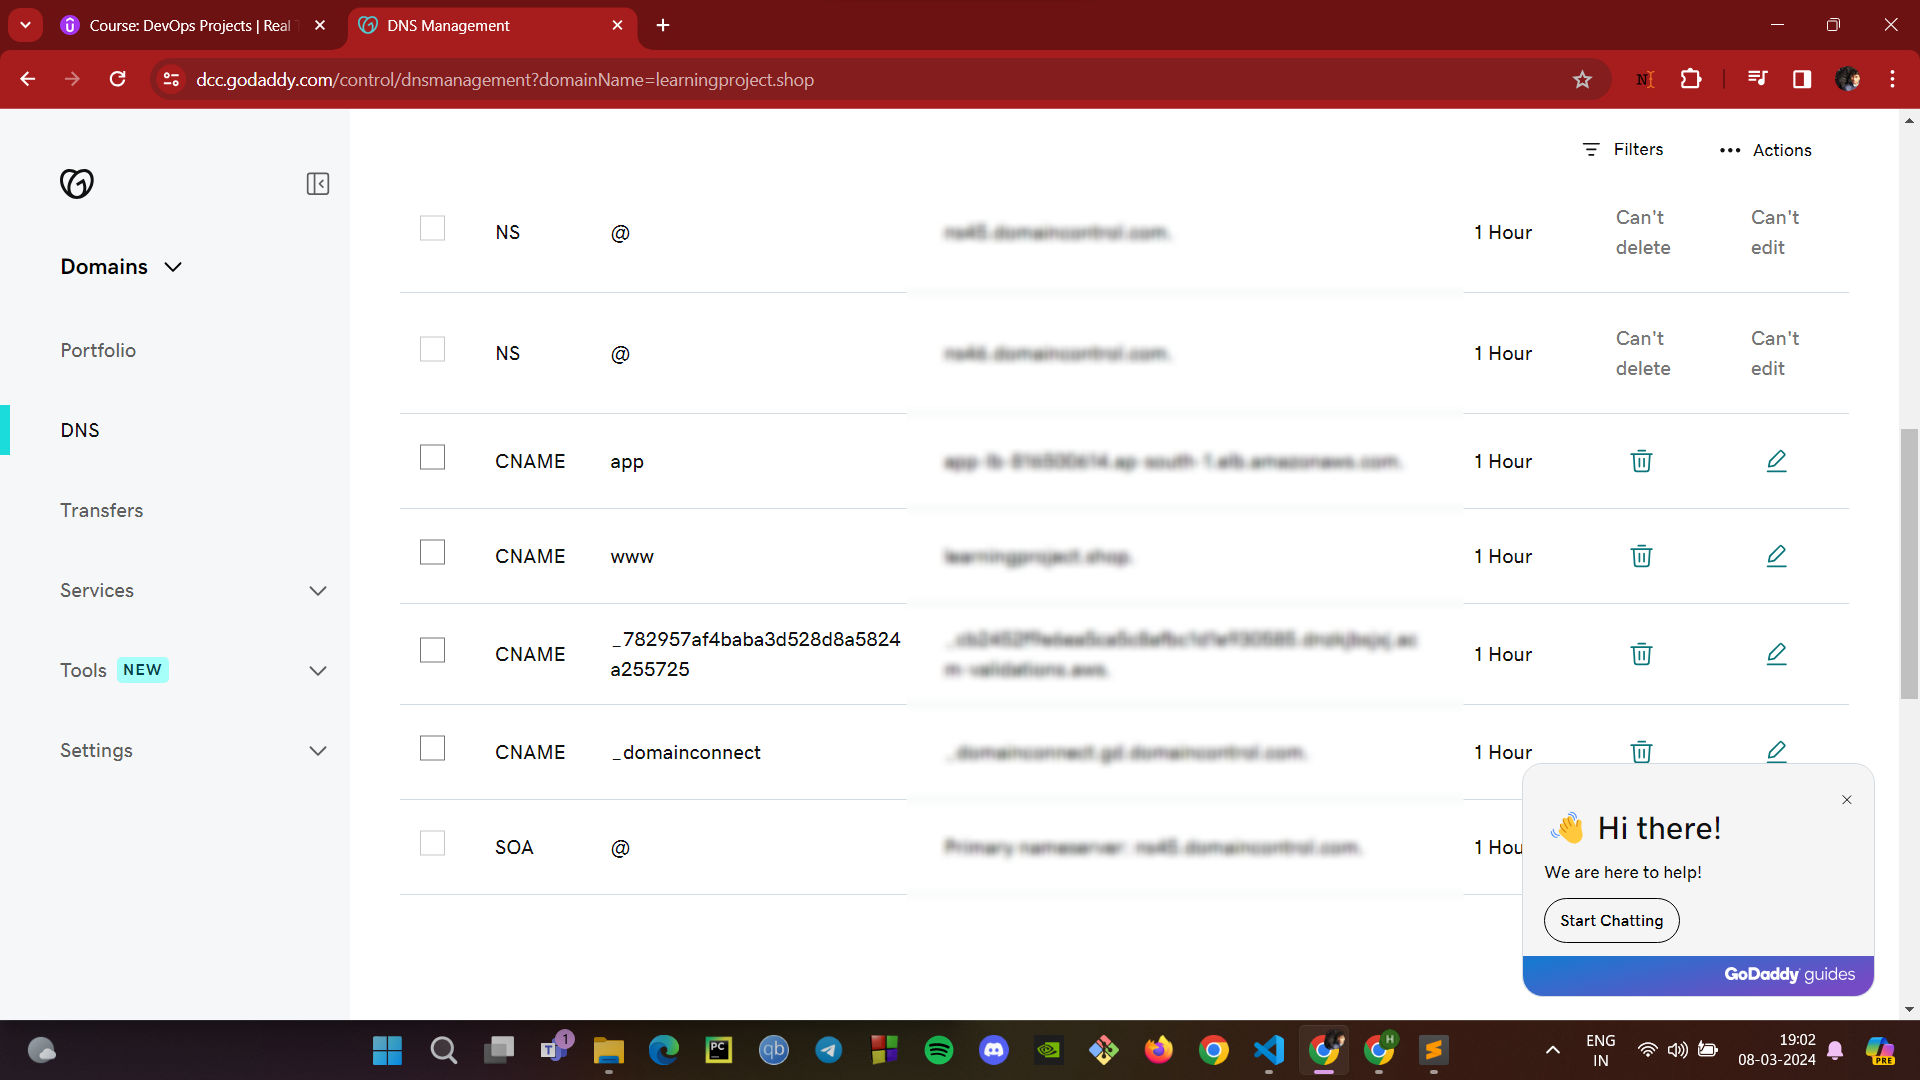
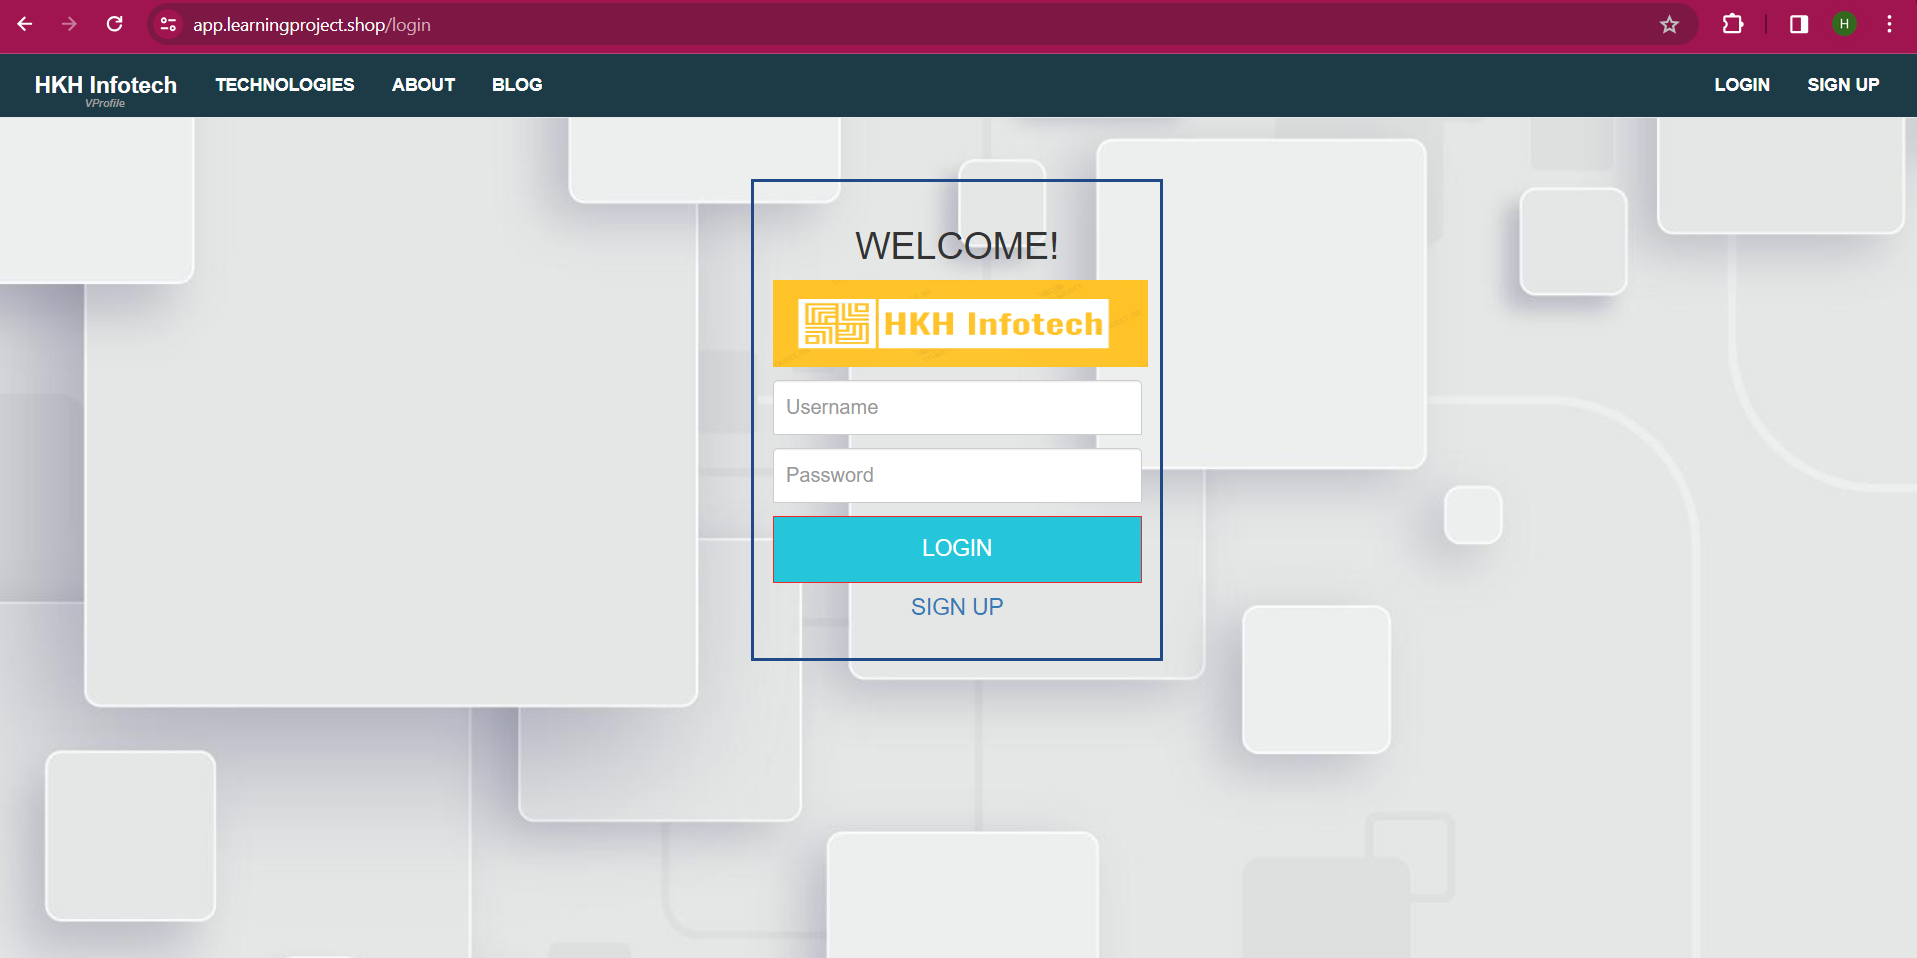
DNS Configuration with GoDaddy:
Log into your GoDaddy DNS Management Console.
Create a CNAME record that points your domain (e.g.,
learningproject.shop) to the DNS name of your ELB.This will allow users to access your application using your domain name, which will be routed through the ELB to your application.
By completing these steps, your application's traffic is now managed by AWS ELB, ensuring that user requests are balanced across multiple instances for better performance and reliability. The CNAME record on GoDaddy ensures that your domain name correctly routes traffic to your load balancer, making your web application accessible via a friendly URL.
Step 7: Setting Up Auto Scaling for High Availability
Auto Scaling ensures that our application can handle the load by dynamically adjusting the number of EC2 instances in response to traffic demands. Here’s how to set it up:
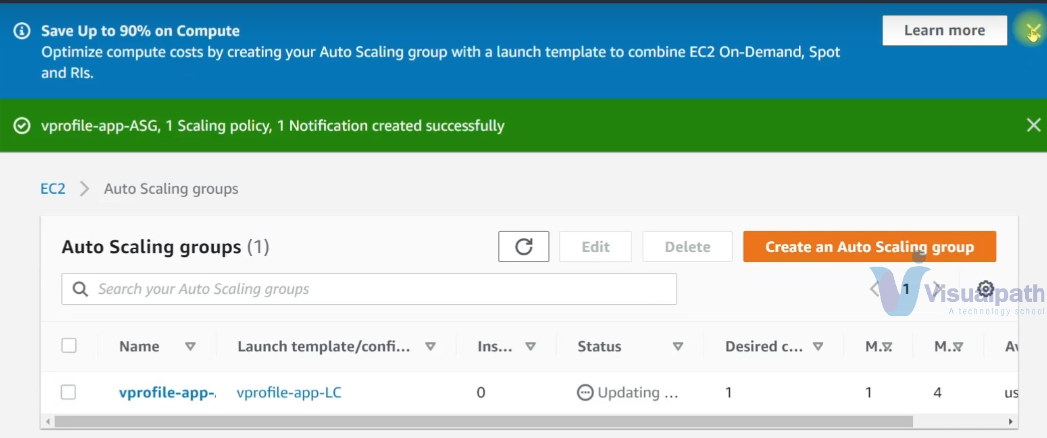
Create an Auto Scaling Group:
In the AWS Management Console, go to the EC2 service section and select ‘Auto Scaling Groups’.
Click on ‘Create an Auto Scaling group’ and choose a launch template that includes the AMI and instance type you need for your application.
Define the group name, for example,
vprofile-app-ASG.
Configure Scaling Policies:
Decide on the desired, minimum, and maximum number of instances. These numbers will depend on the expected load and your application's architecture.
Set up scaling policies that determine when to launch or terminate instances based on criteria like CPU utilization, network input/output, or even a custom metric.
Verification:
Confirm that the Auto Scaling group is created successfully. You should see a notification stating that the Auto Scaling group, scaling policy, and notification were created successfully.
Monitor the 'Activity History' and 'Instance Management' sections to ensure new instances are launched and terminated according to the scaling policies you've set up.
By following these steps, you ensure that your application remains available and performs well, even as demand fluctuates. Auto Scaling is a crucial component for maintaining cost efficiency while delivering a seamless user experience.
Project Summary and Validation: Scalable Web Application on AWS
After meticulously setting up our infrastructure and services on AWS, we have reached the final step: validation. It's time to confirm that each component of our web application functions correctly and that the entire system works harmoniously.
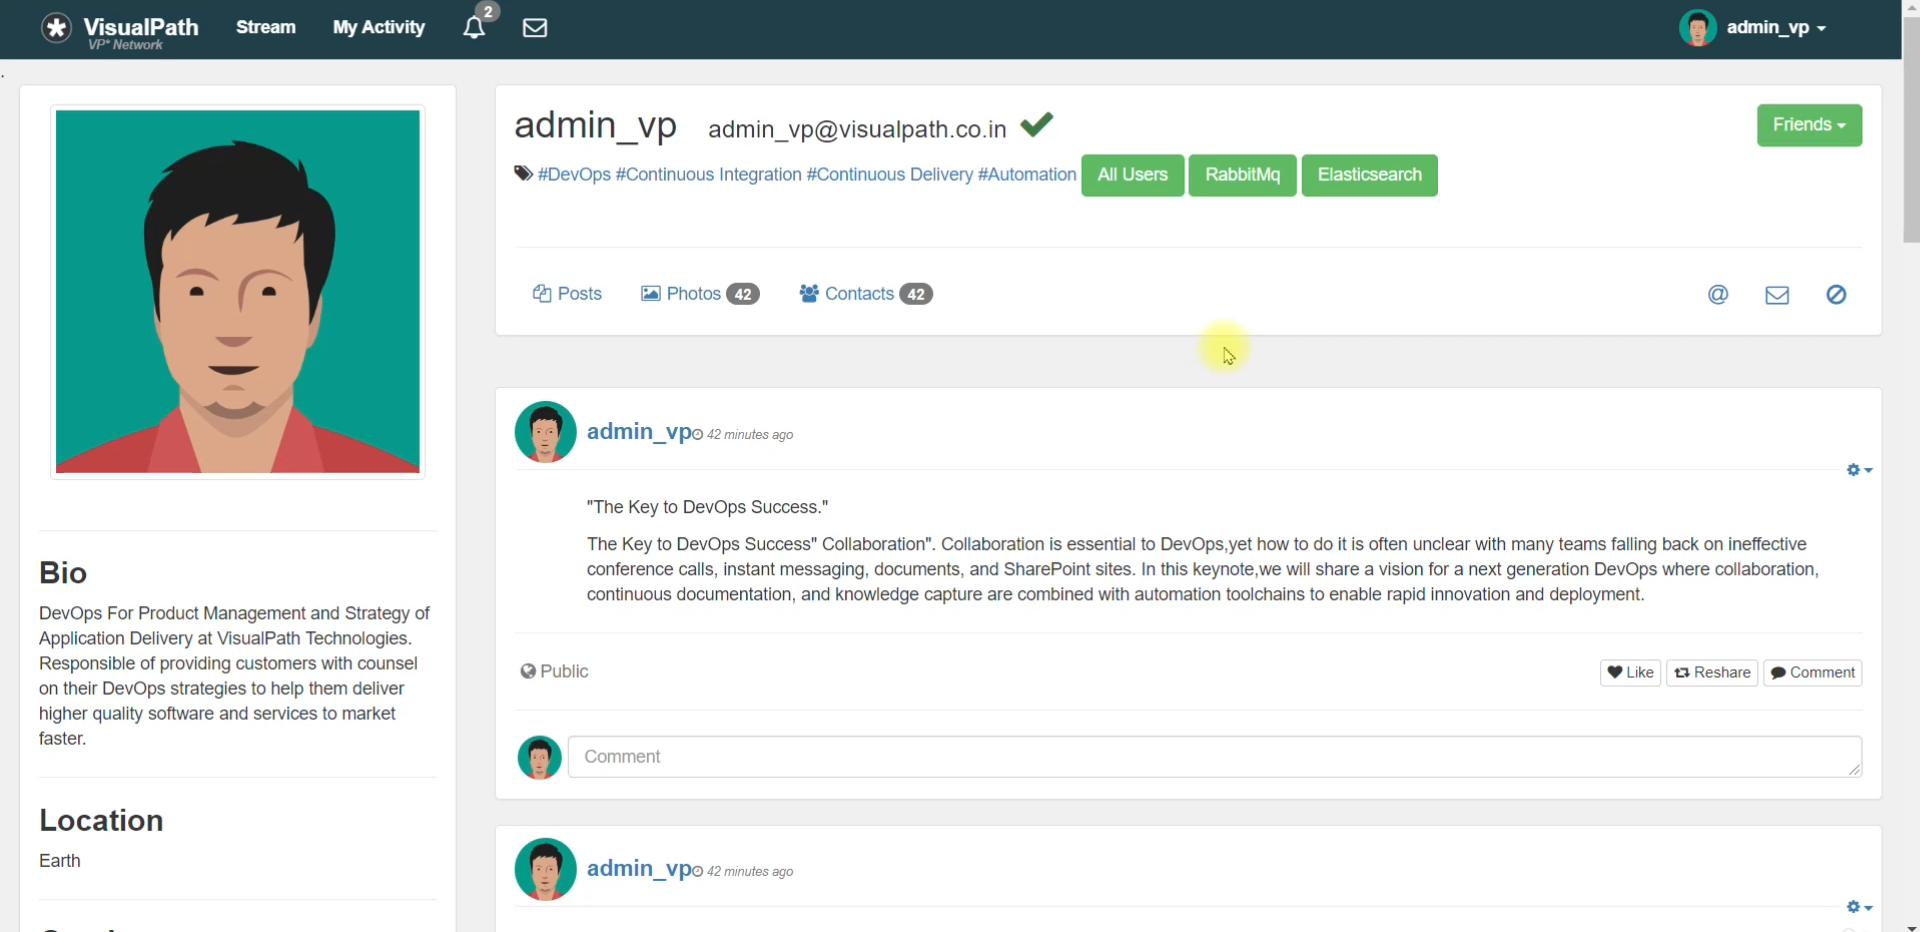
User Access and Domain Configuration
Users can access the application through the custom domain provided by GoDaddy. The domain is configured to point to the Elastic Load Balancer (ELB) endpoint.
The ELB has an HTTPS certificate from Amazon, ensuring secure communication over the internet.
Application Load Balancer and Backend Services
The ELB is set to listen on ports 80, 443 (HTTPS), and 8080 (HTTP), directing traffic to the Tomcat instances which serve the application.
The backend services like RabbitMQ (RMQ), MySQL, and Memcached are placed in a private DNS zone within our VPC, allowing them to interact securely using backend security groups (SG).
Deployment and Auto Scaling
The application artifact, built on Windows using Maven, is deployed to an S3 bucket. From there, it is copied to the Tomcat instances.
An Auto Scaling group is configured to automatically adjust the number of EC2 instances in response to traffic demands, ensuring high availability and cost-efficiency.
Conclusion
Our scalable web application on AWS is now live. It's built to adapt to changing loads with Auto Scaling, secure in transit with HTTPS, and robust in operation with a private, internal DNS setup for backend services. This setup not only maintains high performance but also demonstrates a cloud-native approach to modern application deployment.


